Want to know how to create a website with WordPress Step by Step? Use this awesome guide to learn how to set up a WordPress website from scratch.
You might be starting a blog, a new business venture or wanting to take your existing business online, whichever one of these is you I am going to guide you through the process of starting a WordPress from scratch.
How To Create A Website With WordPress Step By Step In 2024
These are the 5 steps I am going to walk you through.
Step 1: Get a Domain Name & Web Host
Step 2: Install WordPress & Choose a Theme
Step 3: Add Essential Plugins
Step 4: Create A Homepage In Minutes
Step 5: Make Your Website Live
Starting a website can take a very short amount of time with some guidance. The one resource your new website needs is a bit of your time. If you can set aside an hour and follow the below steps, your WordPress website will be up and running in no time!
Want to know the Secret To Creating A WordPress Website From Scratch?
You need time initially in learning how to create a website. So read this blog post, bookmark it and come back to it. If you can spend 30 mins on getting started today and 30 minutes tomorrow then at least you will have begun. Building a website from scratch is not difficult but it does require an element of patience and a few minutes of your time each day or week depending on when you want to launch your website.
So, let’s go!
Step 1: Get a Domain Name & Web Host
To keep this process as simple as possible, for your first website I recommend buying your domain name and web hosting from the same provider. I recommend 20’s Web Hosting.

Web Hosting
What Is Website Hosting?
You need your website to be hosted on a special type of computer called a server. Companies that lease or rent space out on these servers are called web hosts. They host your website on their server. A web hosts job is to make sure that their servers are up and running constantly. This is why you have to pay for a web host, because you are paying for a company, consisting of a team of people to keep these servers well maintained.
What to look for in a web host
- Awesome customer support.
- WordPress management tools.
- Timeline backups.
- Free SSL certificates.
- A user friendly portal.
- Web speed optimisation tools.
The web host that ticks all of these boxes is 20i. In numerous tests, they have come out on top as the fastest web hosts. Their customer support response time is extremely fast meaning they are perfect for beginner’s who might have questions when starting out.
Why Do You Need Web Hosting?
Starting a quality website from scratch is not expensive, but it’s also not free. People who say you can build a high quality website that people want to visit for free obviously don’t own any. It’s complete and utter nonsense that you can build a successful website completely for free. This is because you need to pay for a quality hosting provider.
Why Is Important To Get A Quality Hosting Provider?
Your hosting provider ultimately controls your website. If your hosting providers server goes down, so will your website. To protect your website from going offline it is therefore essential you use a quality hosting provider that maintain their equipment. There is lots of information on why you should pay for decent hosting online, so I’m not going to bore you with it too much here. But in essence a rubbish hosting provider can equal a slow and poor quality website. Don’t let this be your website!
What’s A Domain Name?
This is your websites address on the internet. The domain name for this website is prowebsiteguide.com.
How You Get A Domain Name
If you know the name of your business or brand then you can pop it into the domain search with your host see if the name is available. I recommend 20i Hosting. If your brand name is not available, you can use a great free tool called Lean Domain Search. This tool is great at helping you find alternative domain name names. Go for a .com domain name whenever possible.
I recommend 20i‘s hosting because they have amazing customer support and because of they come out number 1 as the top web host for website speed (this is very important for SEO – Google loves fast websites!)
Step 2: Installing WordPress & Choosing a Theme
It used to be the case that you would have to manually install WordPress onto your website database. Nowadays most hosting providers provide an easy instant WordPress install.
Installing WordPress
First, login to your hosting service that you set up in step 1. You should see a screen like this which contains your WordPress tools.
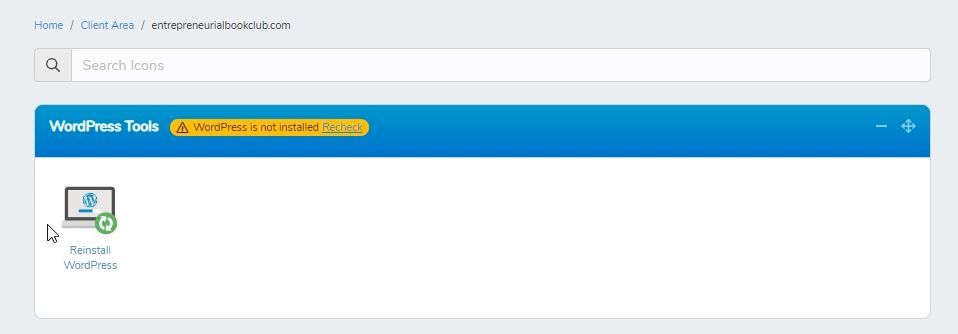
Select install WordPress.
Once selected you will be taken to the WordPress install page. So now we are installing WordPress, the free open source software on to our website.
Select your language.
There is an English (United Kingdom) option too.
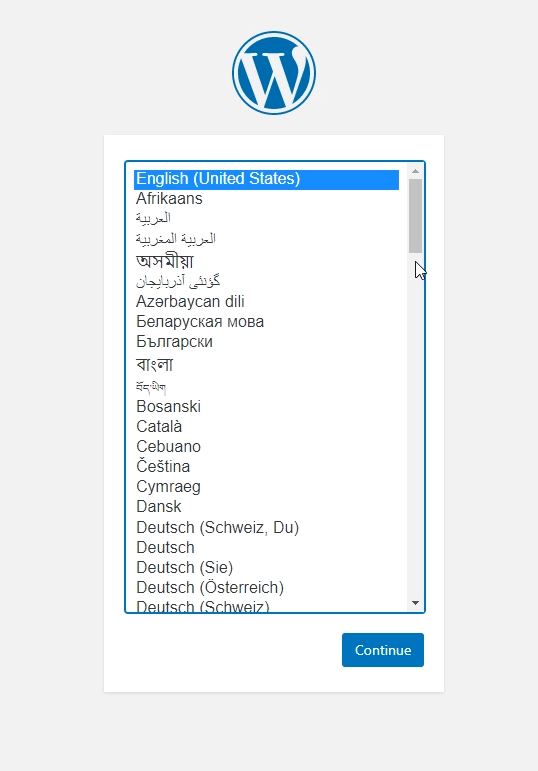
Select continue. You will be greeted with this page:
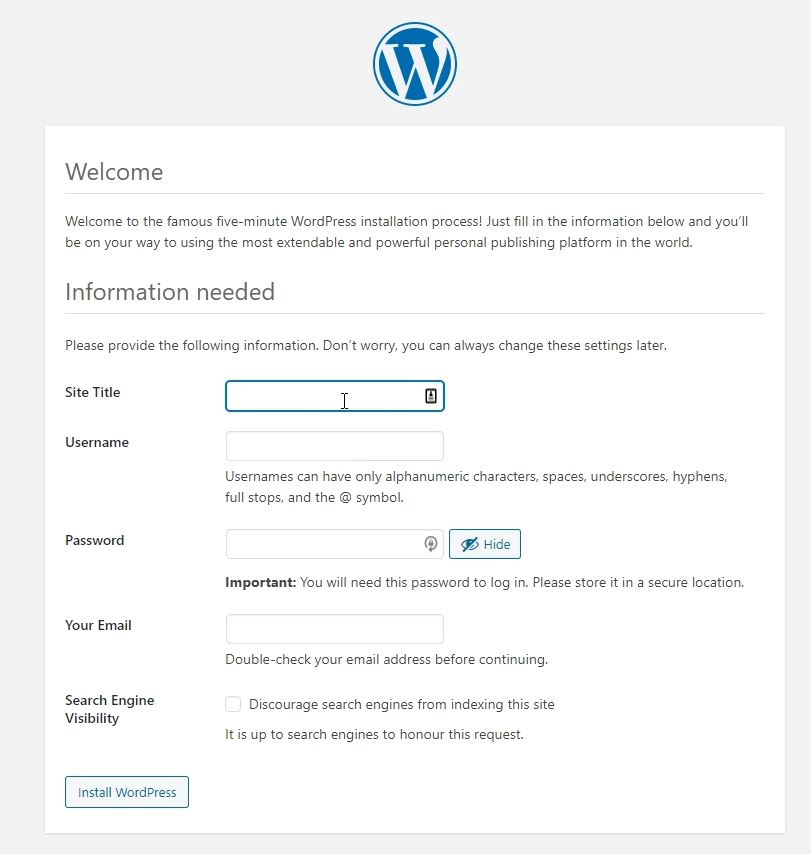
Enter the Site Title. This is the name of your website.
Create a username and password. Make sure you enter your email address correctly.
Select install WordPress.
Success! WordPress has been installed. Well done.

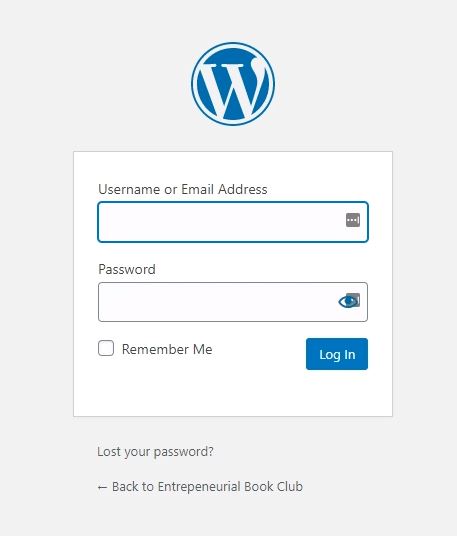
Now it’s time to login! Select the login button.
As standard WordPress will automatically create a login page for you. This is usually your url address followed by /wp-login.php i.e www.your-url.com/wp-login.php
When you have navigated to the login page, enter your username and password.
Well done, you have installed WordPress and successfully logged in! You should be greeted with the WordPress dashboard:
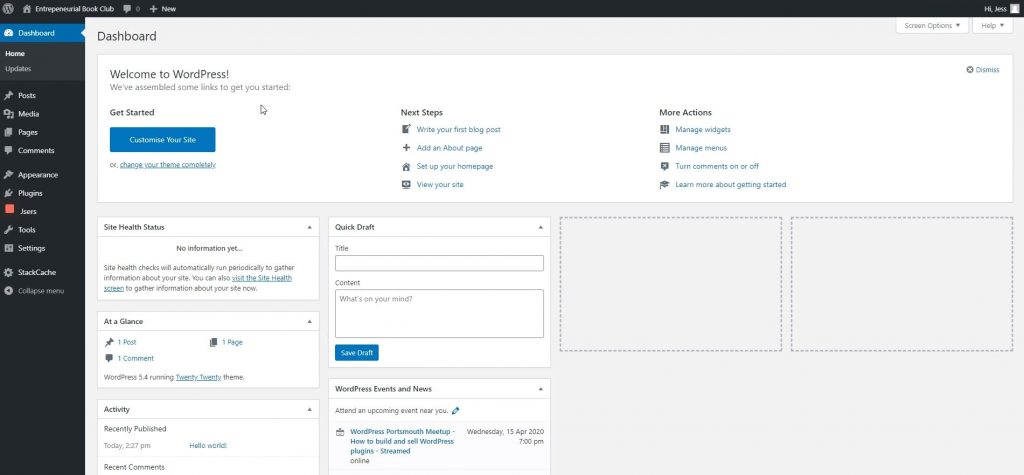
Don’ be daunted by the dashboard. Take a moment to get familiar with it.
View the intro to the dashboard video.
Adding A Theme
One of the reasons WordPress.org is awesome is that you can change the entire look of your website in the click of a button – just by changing the theme! A theme acts as a skin over the top over your website content. Your WordPress theme will add and change the fonts, spacing and overall design of your website.
The theme you choose is extremely important. Here’s why:
- If you choose a poor quality theme it will be very easy for people to hack your website.
- If it’s not simple to use you will waste a lot of time trying to amend your theme and edit certain sections of your website.
- Some themes can slow down your website making it difficult to use.
Building your first website is a big achievement. There is a lot to learn. To save as much time as possible, I recommend picking a premium theme that is simple to use. Don’t make things difficult for yourself by using a cheap theme that’s not very easy to format.
You want a theme that keeps your website fast, is simple to customise and easy to use. Also you must ensure it is well maintained and has a dedicated support team. Bearing all of this in mind, I recommend the following theme providers:
Astra
I LOVE this theme! The stand alone Astra theme is completely free but if you go Pro you can add on a load of other customisation options to your website. The great thing about Astra is your easily customise any area of your website. A lot of themes do not have this functionality which is why I wholeheartedly recommend it.
It’s the theme I use on this website.

Add Essential Plugins
What is a plugin?
A plugin is a piece of code that you can literally ‘plugin’ to your website. Adding a plugin to your website will increase your websites functionality. For example, you might want to add a contact form, embed a Google map or display your Instagram feed.
What Could Happen if You Choose the Wrong Plugin?
It could potentially:
- Cause an error on your site and take it completely offline.
- Slow down your site.
- Introduce malicious code that will mean your website will be open to hackers.
How to Choose The Right Plugins
- Try to use plugins from reputable developers or directories (like WordPress.org).
- Read reviews and check how popular a plugin is before installing it.
- Check the last review of the plugin was left within the past couple of months.
- Check for the last time a plugin was updated to make sure it’s still maintained, and that it works with the most current version of WordPress.
Plugins enable you to do amazing things with your website and they’re often free. Just make sure that whatever plugin you install, it’s from a reputable developer.
Plugins I Recommend
WP Forms – If you want to add a contact form on your website. WP Forms has a simple interface and it’s free!
Gutenberg Blocks – Ultimate Addons for Gutenberg – This plugin will automatically add nicely designed blocks to use with the Gutenberg editor. If you want to add a Google map, testimonials or icons to a simple website then this is for you.
Rank Math SEO plugin – There is no denying I LOVE this plugin. If you want to optimise your web pages and be guided through the process then Rank Math makes it simple for a beginner. You’ll wonder if you should get Yoast… don’t. Get Rank Math. It has more features than Yoast and is completely free.
Insert Headers and Footers – Easily add your Google Analytics tracking code with this nifty plugin.
Instant Images – Instead of the lengthy process of sourcing stock images, downloading them to your device and uploading them to WordPress, this plugin enables you to search, select and add the images directly to your website without leaving WordPress.
How to Install A Plugin
- Login to the WordPress dashboard
- From the admin panel on the left hand side select Plugins > Add New
- Use the search bar to search for the relevant plugin.
- Select Install > Activate.
Create A Homepage in Minutes
Using the free Astra theme and a couple of plugins, you can create a professional looking homepage in minutes. Here’s how:
Step 1 – Install these plugins:
Elementor – Elementor is going to give us the functionality we need to turn our WordPress website in to a super simple page builder, which makes it much easier when it comes to creating a very simple website.
Astra Starter Sites – This plugin is created by the Astra theme team and provides us with easy to use website templates. You can view the templates here, I recommend having a look at the templates, viewing the demos and selecting a template before you begin to create your homepage.
templates which are available for us to use along with the element of page builder. So we can create a really simple homepage very, very quickly using one of their templates. Now that templates are really good looking, you can completely customize them. So I really recommend if you go creating website for the first time doing it this way, it’s going to take a, make a lot more time available for you.
Once they are installed, make sure you Activate them.
Step 2 – Install a template.
From the left hand admin panel hover over Appearance > select Starter Templates.
You will be given the option to select a page builder.

Select Elementor.
Choose a template from the options.
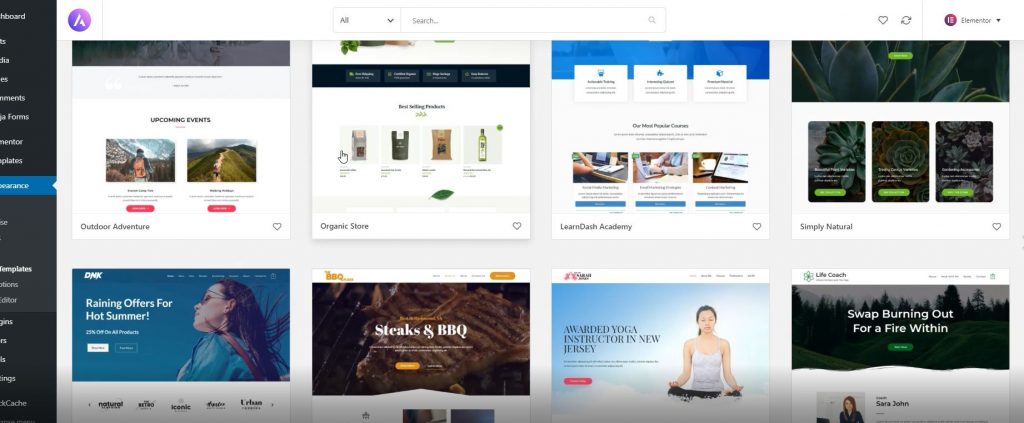
At the bottom right hand side of the screen you will be given two options:
Import Complete Site or Import “Home” Template.
I’m going to talk through importing the “Home” template option, but feel free to import the complete site if you would like to.
When the template has imported you should see this message:
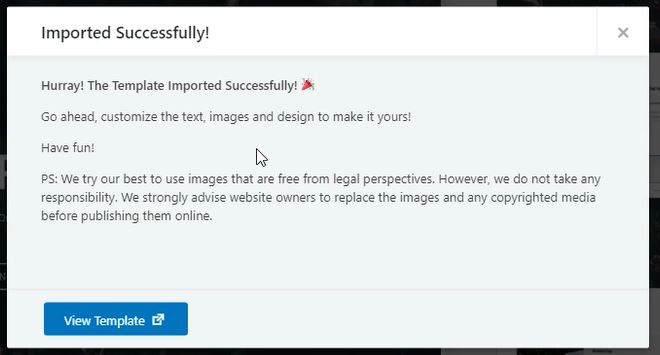
Select View Template.
Step 3 – Ensuring Elementor inherits your theme settings
Once you’ve imported your Astra template you can select view template. This will probably have imported the template, but it might not have imported the correct font and text that you have used across your website with the Astra theme. One of the ways we can change that is by editing a setting in Elementor.
From the left admin panel hover over Elementor > Settings.
There is a box which says Disable Default Colors. Checking this box will make Elementor inherit the colors from your theme.
Check this box.
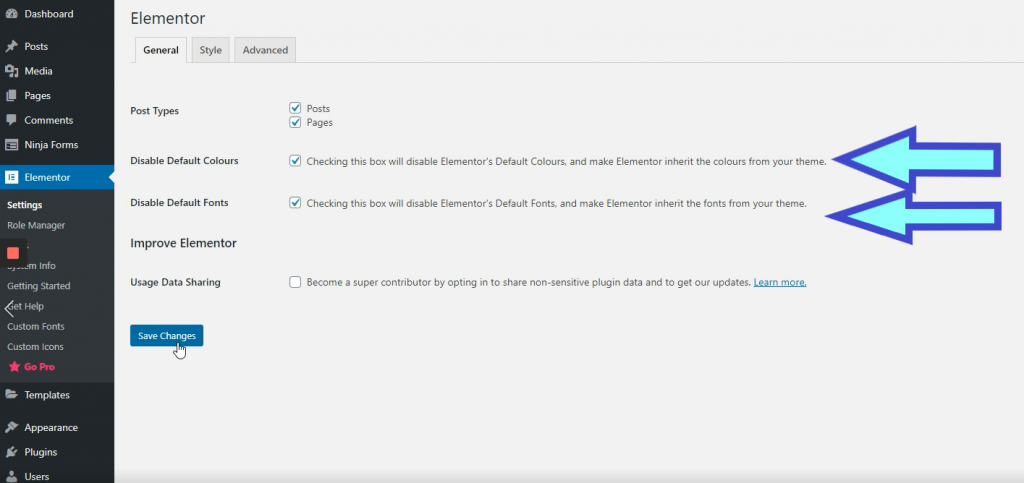
All of the theme settings we have customised will now be inherited by Elementor.
There’s another box which is Disable Default Fonts.
Check Disable Default Fonts. Checking this box will make Elementor inherit fonts from the theme.
Select save changes.
Step 4 – Customise the template.
After selecting View Template you will be taken to a draft page featuring a template of your homepage. You are now able to completely customise this page to make it fit with your brand. You can personalise the colours, logo, font, images and much more!
Make Your Website Live
Congratulations! ?
If you have made it to this step then you will have:
- Purchased a domain name.
- Got yourself a web host.
- Installed a theme.
- Added some important plugins.
- Customised your website and added it’s content.
Which means you are ready to make your site live and show it off to the world! Well done!